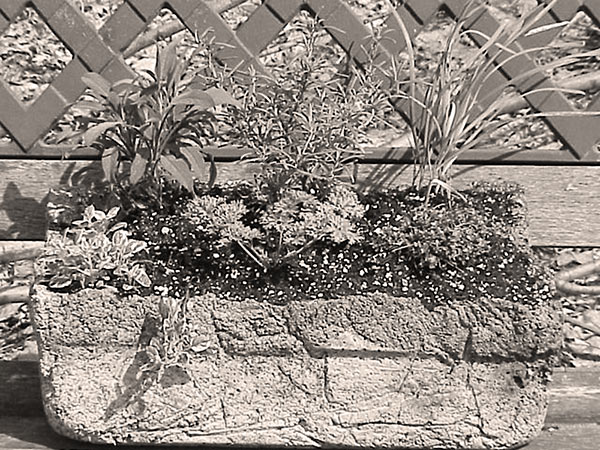
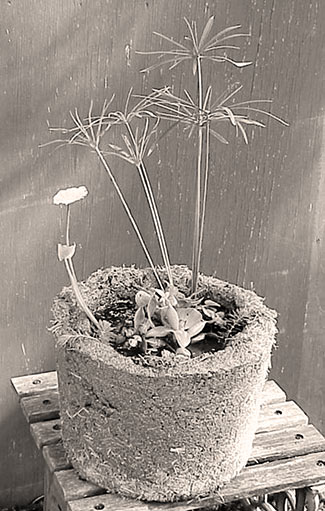
These handmade hypertufa garden troughs mimic old stone and look great in the garden
by Jean, Roxanne, and Rita Riggs
Hypertufa is the name given to the plant containers made of cement, vermiculite (or perlite), peat, and fiberglass fibers. The name comes from the porous, volcanic rock (tufa) that is so popular with alpine gardeners because it can be hollowed out and used for planting.
The handmade containers described here have been popular since the 1930s, when the old stone sinks and watering troughs that were prized as planters for special small plants became hard to find and incredibly expensive, not to mention too heavy for the average person to handle.
Hypertufa planters have been used in English gardens for many years, and are being used more commonly in the United States as gardeners realize how good they look. They provide the drainage and the rough, rocky surface that displays the plants perfectly. We have found them to be excellent planters for many herb plants as well, including rosemary, lavender, thyme and santolina topiaries. Sedums, hens and chicks, and many choice miniatures seem to thrive in them as well.

Material List
- Portland cement
- Vermiculite or perlite
- Sphagnum peat moss
- Fibermesh fiberglass fibers (for reinforcement)
- Molds
- Mixing container (a wheelbarrow works well)
- Measuring container
- Rubber gloves with long sleeves
- Water for mixing
- Plastic drop cloth
- Plastic garbage bags (to cover the molds so the mixture doesn’t stick to them)
- Pencils or dowels to make drainage holes
- Hardware cloth or chicken wire (optional; for extra reinforcement on larger troughs)
A few notes on the materials. It is preferable to use cement as opposed to concrete, which is a mixture of cement and aggregates (sand, gravel, etc.). You will often find the cement bags listed as “Portland cement.” It is best to avoid using sand in the hypertufa mix because it doesn’t seem to bond as well as the vermiculite or perlite, not to mention the fact that it makes the finished product much heavier. The fibermesh is obtainable from a building supply company and looks like tiny strands of white hair. Since the hypertufa is only part cement, the fibermesh helps add strength to the mixture.
Hypertufa recipes
Before you start, select a place in the shade where the newly molded trough can dry for several weeks, and where it doesn’t freeze. Spread the plastic drop cloth over your work surface.
Recipes for the hypertufa mixture vary quite a bit from reference to reference, but this one worked best for us:
- (1) 60-pound bag of cement with fibermesh already mixed in
- (4) 1-pound coffee cans of vermiculite
- (4) 1-pound coffee cans of peat moss
- A supply of water to mix the ingredients together into a stiff, mud pie consistency
The mixture should hold its shape without pooling water on the surface. If you get it too wet, add some dry ingredients and mix them in until the consistency is correct. For some of your molds, you may want to mix in a couple more handfuls of fibermesh for additional strength. We also found that we could better tell if the water proportion was correct if we mixed the materials with our gloved hands instead of using a hoe.
To illustrate the variance in recipes, others have had good luck with these proportions, which will yield a lighter trough:
- 1 part cement
- 1 part vermiculite or perlite
- 1 part peat moss
- 1/5 part fibermesh
Step-by-step instructions
Select a mold, which can be a sturdy cardboard box, small plastic tub, a metal pan, or something equivalent. You can build the trough on the outside or inside of this mold. If you build on the outside, you will be shaping and forming the trough’s exterior walls. If you build on the inside, the trough’s exterior walls will take the shape of the mold’s interior walls.
For building on the outside of the mold, cover it with plastic and then start patting the hypertufa mixture onto the mold. Remember that you are building the trough upside-down and the mold will be the trough’s planting (inside) area. We found that steep-sided molds worked better if we used the inside, and slope-sided molds could be done inside or out. The bottom should be 1-1/2 to 2 inches thick, and the sides should be at least 1 to 1-1/2 inches thick. Use the pencils or dowels to create several drainage holes in the bottom. Make sure the bottom is level or the final product will rock slightly.
If you are making a large trough, now is the time to consider adding the reinforcement wire, already shaped to the mold. Since it can be tricky getting the chicken wire to stay in place while you are patting away adding the hypertufa mix, it is preferable to simply build the joints (where the walls and bottom come together) sufficiently thick so that they are strong enough on their own.

Allow the trough to sit and dry for 2 or 3 days. If it is drying too fast or your work area is warm, mist it daily to keep the surfaces moist to avoid cracking. When the container is semihardened—that is, hard enough to not make a fingerprint, but still soft enough to scratch with your fingernail, you can unmold it, remove any plastic that sticks to it, and make whatever natural-looking gouges, artistic pictures, or signatures you want for the trough. Make sure the drainage holes haven’t filled in.
Removing the mold allows the hypertufa to dry thoroughly inside and out. Total drying time varies according to humidity and temperature. Ideally, you want the mixture to cure as slowly as possible since this will yield a stronger trough. You can achieve this longer curing time by covering the trough with plastic and misting it every couple days to keep the humidity high. Most recipes say to let them dry or cure until they sound hollow when tapped.
The finished planter will often have the fuzzy hairs of the fibermesh sticking out. You can easily remove these by melting them with a handheld propane torch or barbeque lighter. When the flame passes over the fibermesh, the hairs melt away quickly.
Some sources say to neutralize the chemicals in the cement by rinsing the trough repeatedly or by using chemicals. We prefer to avoid the chemicals and simply be patient. We let the troughs weather naturally by sitting outside through several rainfalls before planting. In terms of durability, our troughs have been left outside winter and summer, and they have not cracked or broken. They are somewhat heavy to move around (although not nearly as heavy as concrete), so if you make a large one, you may want to construct it where it is going to be placed.
The material cost to make your own trough is very low. Considerable savings can be had by making your own compared to purchasing an actual stone trough. And, of course, the satisfaction of knowing you built it yourself.
Jean and Roxanne Riggs operated Sunshine Farm and Garden in Oakland County, MI.
Related: Growing vegetables in containers
Elsewhere: Successful container gardening

Leave a Reply